Get your Webdev Hosted email from your Gmail Account
To send and receive your Webdev Hosted email from your Gmail account - please follow the steps below.
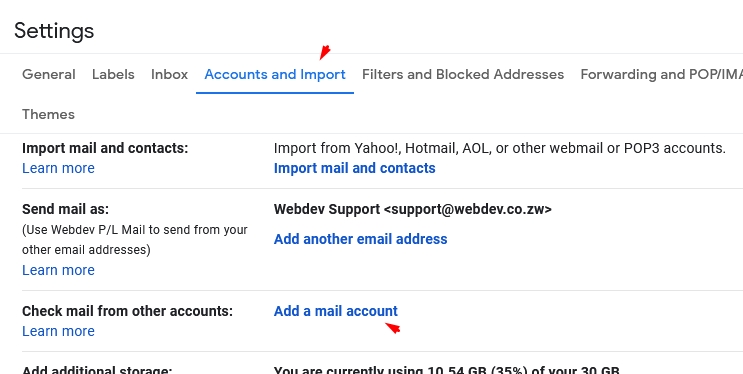
- After successfully setting up your email account in cPanel - proceed to login to your Gmail account, and navigate to the settings

2. Navigate to Accounts and Import -> Check Mail from other Accounts -> click on Add a mail account
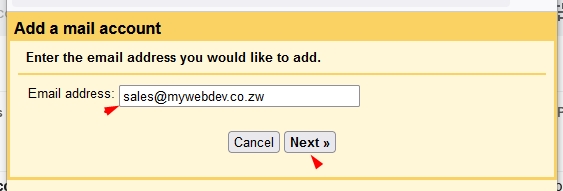
3. In the new PopUp window - type in your Webdev hosted email address, then click Next
4. Populate all the required fields not forgetting
- username = full email address
- password = the password set for your email account when it was created in your cPanel
- POP server - the mail server settings specified for your domain / mail.yourdomain.name
- Port = 995 - and Select Always use a Secure Connection SSL when retrieving Mail (always use 995 as setup will not work with Non SSL ports (110)
- * You can choose to leave a copy of the email on your account. Note that un-selecting this will result in the mail being deleted from your Webdev Hosted Account once it is downloaded to your Gmail.
- *Optional - you can choose to label incoming messages as that will differentiate emails from your Webdev Account Vs emails from your Gmail account easily
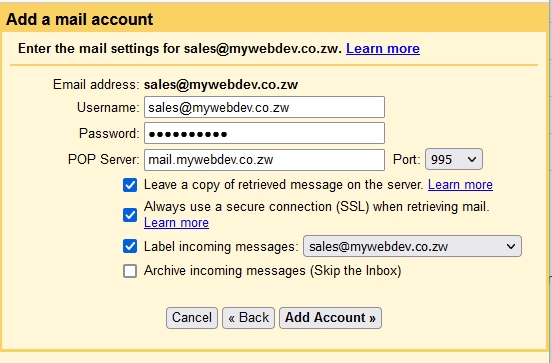
Once done with the step above - Click Add Account
5. You will see a notification confirming that adding the account has been successful.

You may now proceed to setting up sending emails from Gmail with your Webdev Hosted account. Click Next
6. Set your desired Name as it will appear from your sending address in Gmail
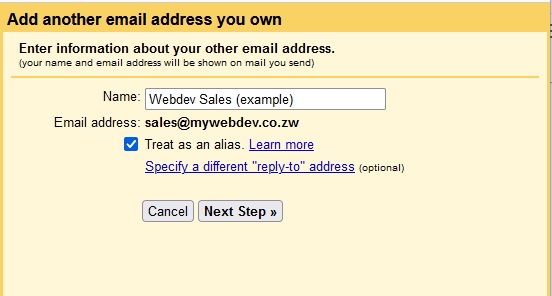
then click Next Step
7. Specify the fields as required
- SMTP Server = the mail server settings specified for your domain / mail.yourdomain.name
- username = full email address
- password = the password set for your email account when it was created in your cPanel
- Port = 465
- Select Secured connection using SSL (recommended)
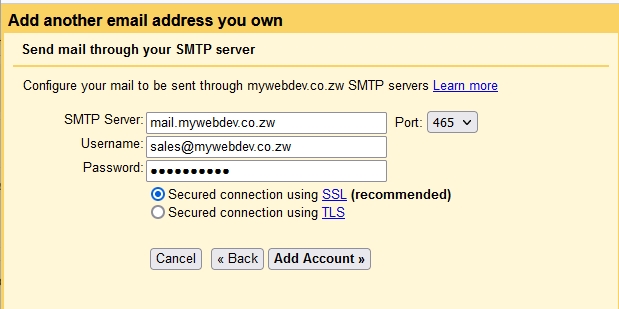
then click Add Account
8. You will need to verify access to your Webdev account
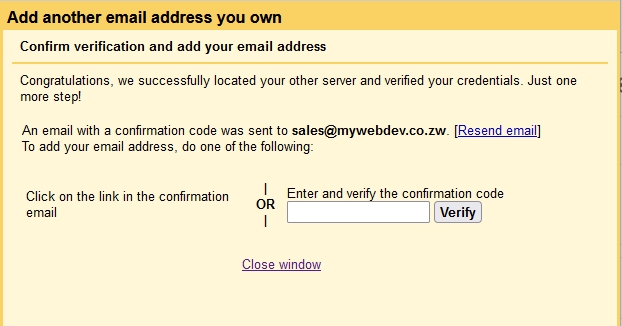
You will do this by going to your Webdev hosted email address and checking for an email from Google with a confirmation code
9. Check you account via Webmail and retrieve the code
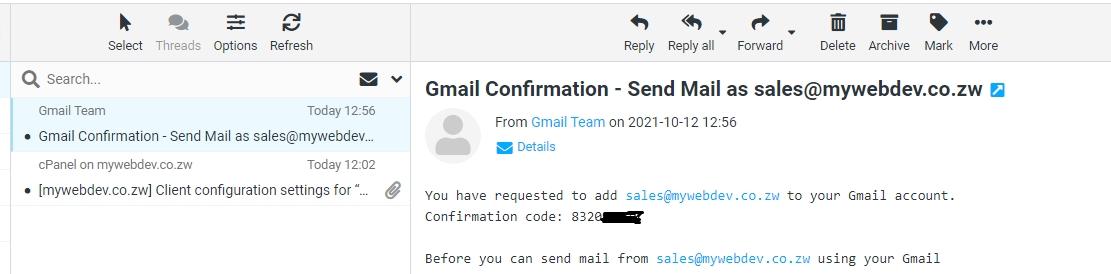
10. Enter the code and click verify. You will be taken back to the main Settings Window
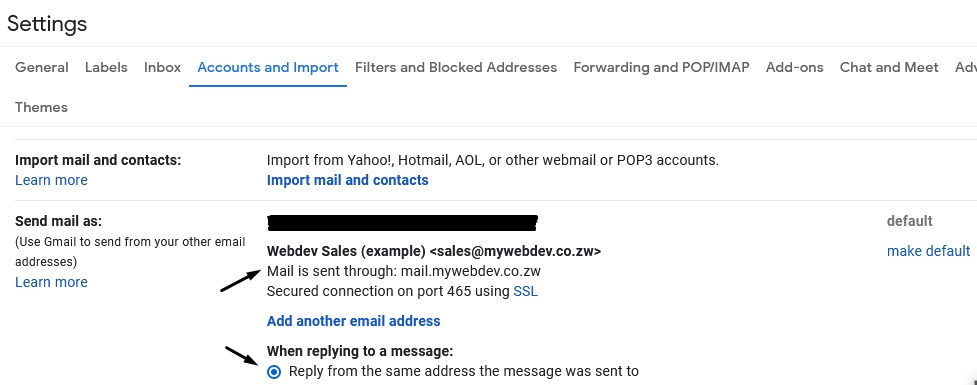
Showing you have successfully added an account to send mail as.
NB: To make replying quick and easy - also select Reply from the same address the message was sent to to avoid having to select your sending address with each email you reply.
Please do not hesitate to get in touch with us on any of our channels for support should you require further assistance with the above setup steps.
Live Chat : http://www.webdev.co.zw
WhatsApp : 0772 572 583
Email : [email protected]
Phone : 08677004796 | 0772 572 583 | 0242 702906 | 0242 702 073 | 0242 705 433 |
Customer Satisfaction Survey
Please let us know how you feel about our services, and how we can improve on them using the link below;
Web Hosting Satisfaction Survey
